Importing nodes, MSPs, and identities
Target audience: This topic is designed for network operators who are responsible for creating, monitoring, and managing the operation console network.
Why import components?
For cases when components have been deployed by one console and need to be operated from other, as well as for cases when certain actions are not possible unless nodes and MSPs and identities are “known” to a console (that is, unless those components have been created in the console or imported into it), the Fabric Operatons Console allows nodes, identities, and MSPs to be exported from one console and imported into another.
While it is no longer necessary to associate an admin identity when importing a node, there are cases where you will want to import the admin identity associated with a node or MSP.
There are two main reasons to import components:
- A node will be deployed in one console and operated from another. In these cases, the relevant admin identity must be exported and imported, or a new admin identity for the node must be created. With the exception of upgrading the version of a node, it is possible to perform many of the same administrative actions on an imported node as on a node that was created within a console.
- A node or MSP simply has to be known by a console so that it can be selected from a drop down list. For example, when creating a channel, it is necessary to choose which ordering service the channel will be hosted on. Similarly, when performing many channel actions, it can be necessary to specify one or more MSPs. In neither case is the person selecting the MSP an admin of the node or the organization. However, they do require the tile representing the node or MSP in their console so it can be selected from the drop down list.
The console uses the information in the JSON to build a representation of the component that can be operated from the console. Likewise, when you delete an imported node from the console, the node itself, which is still running at the location where it was deployed, is not deleted. It is simply removed from the console where it was imported.
After you import a node into the console, you can also modify its connection information by using the node’s Settings tab.
As you will see below, there are two ways to export and import components and identities: in bulk, or one at a time. Each fulfills a different use case and has different considerations and limitations.
Limitations
While importing nodes provides the ability to perform many of the actions that can be performed on the console where a node or identity was created, there are a few limitations on the ability to administer imported components:
- You cannot patch nodes that have been imported into the console.
- You cannot delete nodes that you imported into the console from the cluster where they were deployed. You can only remove the node from the console it was imported to.
- You cannot override the settings of an imported node by using the Edit configuration button to update the
JSON. - If you are importing a node that is deployed on a network deployed locally, you must ensure that the gRPC web proxy port used by the component is externally exposed to the console while you are importing a node on a locally deployed network. For more information, see importing nodes from a locally deployed network.
- When you open the tile of an imported node, the Fabric version is not visible and the Usage and info tab is not available, even if you have also imported the admin identity.
Exporting and importing in bulk
In cases where users want to export and import all of the peers, CAs, ordering services, MSPs, and identities at once, the console now allows for the bulk management of data as a ZIP file that contains the JSON representing the various nodes, MSPs, and identities. To export or import data in bulk, navigate to the Settings tab in the left hand navigation. You will see a section called Bulk data management with two buttons below it. The Export button will open a panel on the right, where you have several options of what to export. The Import button also opens a panel where you can select the ZIP from your local file system.
While exporting and importing components in bulk is highly convenient for some use cases, there are important considerations to keep in mind:
- While you have the option to check or deselect the boxes representing peers, CAs, ordering services, MSPs, and identities, you cannot, for example, choose to export only some peers and not others. If the peer box is checked, every peer will be included in the ZIP, and likewise for other components.
- If a console has already imported some of the information contained in a bulk transfer, for example a few of the peers, duplicate representations of these components will appear in the console after performing the import. These duplicates do no harm, but it is a best practice to only have one representation of a component at a time. The same duplication will not occur when importing ordering nodes.
- The Identities box is left deselected in the export panel by default for reasons we discussed earlier: these identities contain private keys, therefore it is inadvisable to export them unless it is necessary to do so. Also, unlike MSPs and nodes, the console does not permit duplicate identities. If you attempt to import a bulk data ZIP that includes an identity that already exists in your console, the import will fail. Note once again that all identities will be sent in the bulk transfer, regardless of the other boxes you check. For example, if you only leave the peer box selected, and select identities, every identity in your Wallet will be sent, not just the identities relevant to the peer.
- However, if you do choose to export identities along with nodes, the associations between identities and nodes will persist along with the transfer. That is, you will not have to perform the extra step of clicking on nodes and associating an admin identity with them.
- It is necessary that all of the members of a channel have the MSPs of all of the other members of a channel to allow for the validation of signatures. However, note that by selecting the MSPs button, all MSPs in your console would be exported, not just the MSPs relevant to a particular channel.
If you import a bulk data transfer of nodes and do not also import identities, you will have to perform the separate step of associating identities with the nodes. There are a few ways to procure an identity that can operate a node. For more information about, see gathering certificates or credentials. Regardless of the process used to acquire the identity, after the bulk import has been completed you will need to click on each imported node. For peers and ordering nodes, a box on the left of the screen will say Identity not associated with (peer or ordering node), depending on the node in question. After clicking on this box, you will be able to associate the relevant identity by selecting it from your Wallet. Note that this process is distinctly different than the process for importing individual nodes, where you will be asked to associate an identity as part of the import process.
You will also need to associate an admin identity for the CA. This process is similar to the peer and ordering node process except that after you click on the imported CA you will see a separate screen asking you to associate an identity rather than a box on the left.
For cases where bulk data transfers are impractical or inadvisable, you can follow the steps below to export and import components and identities one at a time.
Gathering certificates or credentials
IMPORTANT: Because identities contain private keys, be careful when exporting them to ensure they are handled securely. If a private key is compromised, it can be used to perform malicious actions.
Each Fabric Operatons Console component is deployed with the signing certificate of an administrator inside. When actions requiring the permission level of an admin are performed against the component, the signing certificate of the entity attempting the action is checked against the signing certificate inside the node. If they don’t match, the action is denied. These certificates which also known as “keys”, allow the administrator to operate their components.
If you intend to operate an imported node, you have two options:
- Import the admin identity into your Wallet before importing the node itself (the administrator of the console where the node was created will need to export the node and the admin identity).
- If the admin of the node does not want to share their admin identity, there are two other ways to become an admin of the node:
- The administrator of the console where the node was created can create a new admin identity, associate it with the node as an additional admin identity, and export that identity to your console along with the node.
- The other option has five steps:
- The admin of the CA that was used to create the relevant identities for the peer and peer organization can register a new identity.
- Then, they can send the enroll ID and secret of that identity to the importing console, as well as exporting the CA.
- The importing console can then take the imported CA and use the enroll ID and secret to create a new identity.
- This new identity would be sent back to the console where the peer was created and added as an admin of the peer.
- Then the peer could be exported to the console where the new identity was created, allowing the new identity to operate the imported peer.
In either case, because this new admin identity would only be an admin of the peer and not the organization that owns the peer, it preserves a separation of roles between the organization admin (the sign cert listed in the MSP, which might also be the peer admin in the console where the peer was created), and the new admin of the peer which was just created and associated. This peer admin would not be an organization admin by default. However, if it fits a use case to make an identity the admin of both the organization and an imported peer, this is achievable, see updating an organization MSP definition.
Note that this flow would be most practical for a peer, since the admins of ordering nodes do not have many responsibilities in the Fabric Operatons Console.
If you don’t intend to operate the node (or in the case of a multi-node ordering service, the nodes), you do not have to import and associate an admin identity.
Exporting and importing admin identities into the Wallet
To export an identity, open the Wallet tab and click on the identity you want to export. In the Identity details panel that pops up, you have two options. You can click the Export identity button, which will bundle your signing certificate and private key into a JSON file, and download it to your local filesystem (note that you should always keep a copy of all your identities locally). Alternatively, you can download .pem certificates for both your signing certificate and private keys.
To import a new identity, open the Wallet tab and click Add identity. If you want to upload .pem certificates manually, click New identity and use the fields under Manual entry to give the identity a name and to upload the signing certificate and private key of the identity. If you have a JSON that was exported from another console, click Upload JSON and then Add files, then select the appropriate JSON from your local file system and click Add identity. While you will have this option between entering certificates manually or using a JSON for each node, in this topic it is assumed that you have the relevant JSON handy.
After you complete the Add identity panel, you can view the new admin identity in your Wallet and select this identity when importing any nodes it is associated with. You will also be able to use this identity when creating new MSPs and components.
Importing an organization Membership Services Provider (MSP) definition
Because MSPs define an organization, they are required when creating channels, creating nodes (to identify which organization the node will belong to), and validating signatures. For the latter reason, your MSP must be known (in other words, exported and then imported) by every member of every channel you belong to unless your organization will not be involved in validation or endorsement.
To act as an administrator for an organization, you must have an identity in your Wallet listed in the MSP as an admin of the organization. This means either importing the identity listed in the MSP or by following the process listed in updating an organization MSP definition. This MSP can then be exported to the console where the added identity was created, making the exported identity able to act as an admin of the organization.
The exports and imports of MSPs are performed in the Organizations tab.
To export your MSP:
- Navigate to the Organizations tab and click your organization MSP tile.
- In the tile that opens, click the Export icon.
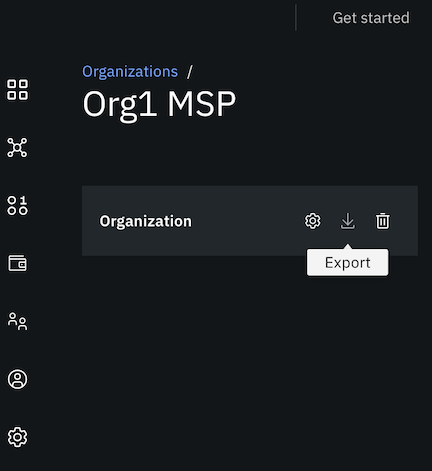
Figure 1. Export MSP button
- A JSON file is generated and downloaded to your local system.
- Share this file with the other organization admins of your channel.
To import an MSP from another organization:
- Navigate to the Organizations tab and click Import MSP.
- Browse to the MSP JSON file and click Add file.
-
Click Import MSP.
NOTE: Under some circumstances, it is possible that the Node OU checkbox may be visible and checked when you import an MSP into your console. If that occurs, it is recommended that you leave it checked so that it enables Fabric Node OU support for the MSP, which simplifies the certificate renewal process for you in the future.
Repeat these steps for each organization that is included in your channel.
Importing a peer
A peer is the component that maintains a ledger and runs a smart contract to perform query and update operations on the ledger. Organization members own and maintain peers. Each organization that joins a consortium should deploy at least one peer and minimally two for High Availability (HA) on each channel. You can learn more about peers in the overview of components.
After you import a peer into the console, you can install smart contracts on the peer and join the peer to channels.
NOTE: If you want to add more peers or create additional admin identities for a peer or peer organization, you need to import the relevant CA (the one that was used to create the MSP and identities for the peer organization) and then use that CA to register and enroll identities.
Before you begin
Before you can import a peer, you need to decide on the method you will use to become an admin of the peer (there is little that can be accomplished with an imported peer unless you also are an admin of the peer). See gathering certificates or credentials and follow the path that best suits your use case. Also, ensure that the JSON representing the peer is available.
How to import a peer
Importing a peer is performed from the Nodes tab.
- Click Add Peer, followed by Import an existing peer and then click Next.
- Click Add file to upload the peer JSON file that was exported from the console where it was originally deployed.
- If you want to operate the peer (for example, to be able to install smart contracts), click on the tile representing the peer and click Associate identity. Then you will be able to associate an identity from your Wallet with the peer. This identity must be identity that was associated with the CA when it was created.
NOTE: If you see the location field during import, you can choose whether to specify the location where the peer was created or to have the peer re-exported, in which case the console will not ask for this information.
After you import the peer into the console, you can install smart contracts on the peer and join the peer to channels in your fabric.
Importing a CA
A CA node is the component that issues certificates to all network entities (peers, ordering services, clients, and so on) so that these entities can communicate, authenticate, and ultimately transact. Each organization has their own CA that acts as their root of trust. You should add your organizations whether you are joining or building a consortium. You can learn more about CAs in the overview of components.
After you import a CA, you can use it to register and enroll users or create organization definitions exactly as you would with any other CA.
To import a CA to the console and operate it, the network operator must have already exported the CA from the Fabric Operatons Console where it was deployed. Importing a CA allows you to register new users and enroll identities.
Before you begin
Before you can import a CA, you need to decide on the method you will use to become an admin of the CA (there is little that can be accomplished with an imported CA unless you also are an admin of the CA). See gathering certificates or credentials and follow the path that best suits your use case. Also, ensure that the JSON representing the CA is available.
How to import a CA
Navigate to the Nodes tab.
- Click Add Certificate Authority, followed by Import an existing Certificate Authority, and click Next.
- Click Add file to upload the CA JSON file that was exported from the console where it was originally deployed.
- If you want to operate the CA, after it has been added, click on it in the Nodes panel. Then click Associate identity and select the CA admin identity from your Wallet.
If you see the location field, you can choose whether to specify the location where the CA was created or to have the CA re-exported, in which case the console will not ask for this information.
After you have imported the CA into the console, you can use your CA to create new identities and generate the necessary certificates to operate your components and submit transactions to the network. To do this, you will need to associate an admin identity with the CA. To learn more, see managing certificate authorities.
Importing an ordering service
An ordering service is the component that collects transactions from network members, orders the transactions, and bundles them into blocks. It is the common binding of consortiums and needs to be deployed if you are founding a consortium that other organizations will join. You can learn more about ordering services in the overview of components.
Importing an ordering service into the console allows you to create new channels for peers to transact privately.
TIP: If you are having trouble with an ordering service you imported, it might be because it was exported too long ago for the JSON representing it to have all of the latest necessary fields in it that allow certain features to work. Reach out to the administrator of the console where the ordering service was created and ask them to re-export the ordering service.
Before you begin
Even in the world of Hyperledger Fabric, ordering node admins do not have many responsibilities. In the Fabric Operatons Console, these responsibilities are reduced even further, and because of the limitations imposed on imported nodes, these responsibilities are reduced to nothing. As a result, there is not much point in becoming an additional admin of an ordering node.
Far more useful than becoming the admin of an ordering node is becoming an admin of the ordering organization itself. This role gives you administrative rights over the ordering service (allowing you to add organizations to the consortium or nodes to the ordering service) as well as over the system channel, giving you the permission to modify system channel capabilities.
Note that it is not necessary for your organization to become an ordering service administrator. You will still need to import the ordering service if you want to create or edit a channel (your organization must be added to the consortium by an ordering service administrator first), as your console must know about the ordering service before you can select it from the drop down list.
How to import an ordering service
Navigate to the Nodes tab.
- If you have not already done so, navigate to the Organizations tab and export the MSP of one or more peer organizations. Then, send this MSP, which represents your organization, to an administrator of the ordering service (which in this case is not necessarily an admin of any ordering nodes, but an organization with administrative control over the system channel). This ordering service administrator can make your organization one of the ordering service organizational admins or add your MSP to the consortium (giving your organization the ability to create channels), or both. Note that if your organization has been made one of the ordering service organizational admins, you have the ability to add your own organization to the consortium.
- After your MSP has been added as an ordering service administrator or to the consortium (or both), import the JSON representing the ordering service (as with the other nodes, this ordering service must be exported from the console where the ordering service was created). Then, navigate to the Nodes panel. Click Add ordering service, followed by Import an existing ordering service. Then click Next.
- Click Add file to upload the ordering service JSON. Note that regardless of how many nodes are in this ordering service, the JSON representing this ordering service will be one file.
It is not necessary to associate an identity with an ordering service in order to create a channel on an ordering service or to join members to the consortium (the latter is handled by ordering service organizations, not the ordering node itself).
If you see the location field, you can choose whether to supply the location or to have the ordering service re-exported, in which case the console will not ask for this information.
After you have imported the ordering service into the console, you can add new organization members to the consortium (if your MSP was added as an admin of the ordering service) and select the ordering service when creating new channels (if your organization has been added to the consortium).
Importing nodes from a locally deployed network
You can import nodes that were created through Kubernetes v1.17 - v1.21 environments into consoles that have been deployed on other clusters. However, you need to ensure that the port used by the gRPC URL of your nodes is exposed from outside the cluster. If you are deploying your network behind a firewall, you need to enable a passthru, for example by using an allowlist, to allow the console outside the cluster to communicate with your nodes.
As an example, you can find the JSON file of a peer below. To communicate with the peer from another console, you need to ensure that the grpcwp_url port, port 32403 in this example, is open to external traffic.
{
    "name": "peer",
    "grpcwp_url": "https://9.30.252.107:32403", \\ensure that port 32403 is externally exposed
    "api_url": "grpcs://9.30.252.107:30891",
    "operations_url": "https://9.30.252.107:30222",
    "type": "fabric-peer",
    "msp_id": "org1msp",
    "pem": "LS0tLS1CRUdJTiBDRVJUSUZJQ0FURS0tLS0tCk1JSUNGekNDQWI2Z0F3SUJBZ0lVUi9zMGxGTG5ZNmdWRmV1Mlg5ajkrY3JDZFBrd0NnWUlLb1pJemowRUF3SXcKWFRFTE1Ba0dBMVVFQmhNQ1ZWTXhGekFWQmdOVkJBZ1REazV2Y25Sb0lFTmhjbTlzYVc1aE1SUXdFZ1lEVlFRSwpFd3RJZVhCbGNteGxaR2RsY2pFUE1BMEdBMVVFQ3hNR1JtRmljbWxqTVE0d0RBWURWUVFERXdWMGJITmpZVEFlCkZ3MHhPVEEyTVRBeE9USXhNREJhRncwek5EQTJNRFl4T1RJeE1EQmFNRjB4Q3pBSkJnTlZCQVlUQWxWVE1SY3cKRlFZRFZRUUlFdzVPYjNKMGFDQkRZWEp2YkdsdVlURVVNQklHQTFVRUNoTUxTSGx3WlhKc1pXUm5aWEl4RHpBTgpCZ05WQkFzVEJrWmhZbkpwWXpFT01Bd0dBMVVFQXhNRmRHeHpZMkV3V1RBVEJnY3Foa2pPUFFJQkJnZ3Foa2pPClBRTUJCd05DQUFUYUtyN2srUHNYeXFkWkdXUHlJUXlGMGQxUkFFdmdCYlpkVnlsc3hReWZOcUdZS0FZV3A0SFUKVUVaVHVVNmtiRXN5Qi9aOVJQWEY0WVNGbW8reTVmSkhvMXd3V2pBT0JnTlZIUThCQWY4RUJBTUNBUVl3RWdZRApWUjBUQVFIL0JBZ3dCZ0VCL3dJQkFUQWRCZ05WSFE0RUZnUVUrcnBNb2dRc3dDTnZMQzJKNmp2cElQOExwaE13CkZRWURWUjBSQkE0d0RJY0VDUjc4YTRjRXJCRE5DakFLQmdncWhrak9QUVFEQWdOSEFEQkVBaUJGWmpMWU9XZUMKLy92L2RNMHdYNUxZT3NCaHFFNnNQZ1BSWWppOTZqT093QUlnZEppZDU0WmxjR2h0R3dEY3ZoZE02RVlBVFpQNwpmS29IMDZ3ZFhpK3VzVXM9Ci0tLS0tRU5EIENFUlRJRklDQVRFLS0tLS0K"
}